
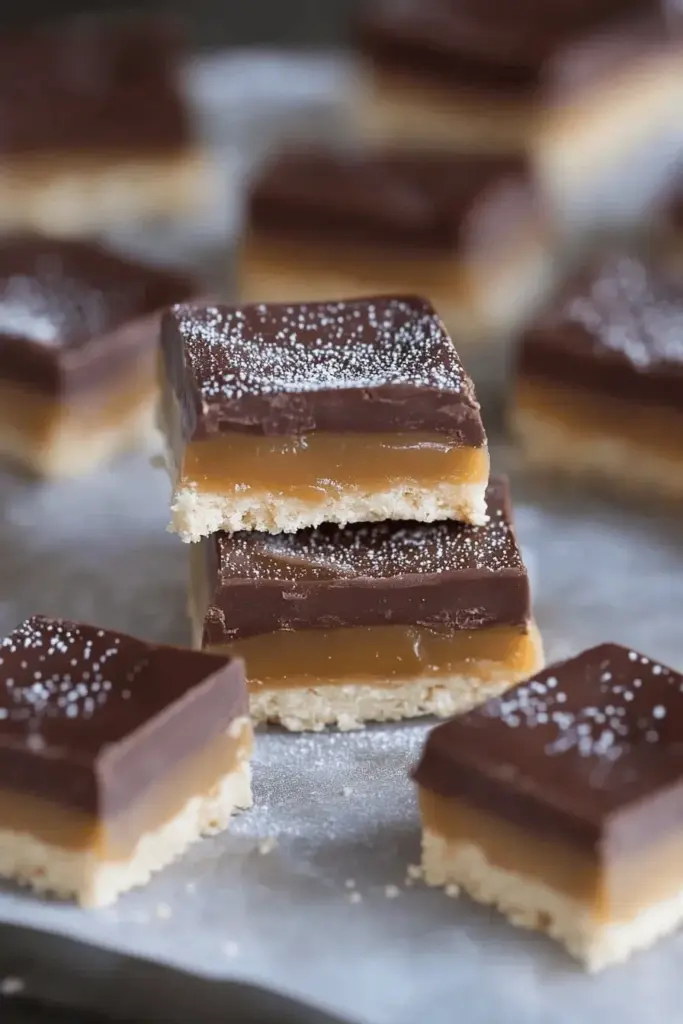
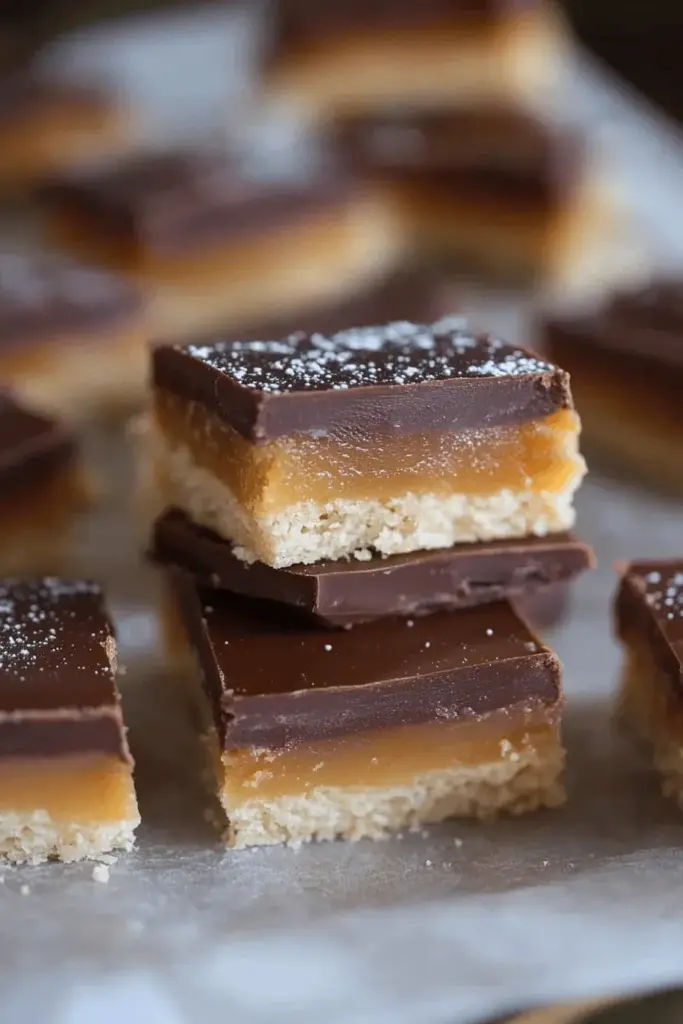
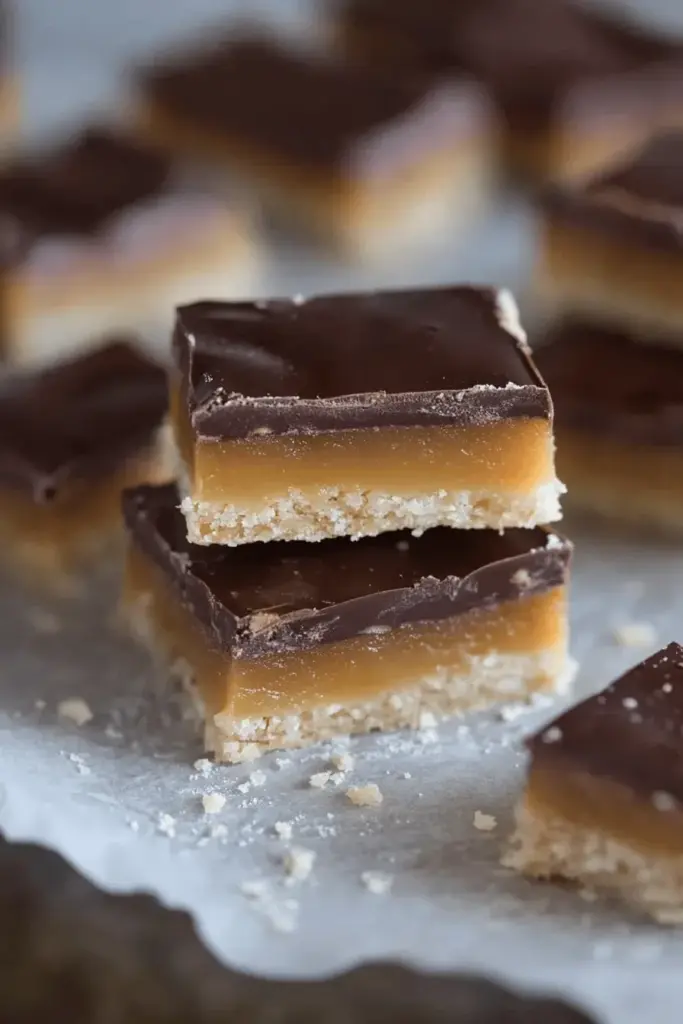
These irresistible homemade Twix bars feature three perfect layers: buttery shortbread, gooey homemade caramel, and silky chocolate. They’re a copy-cat version that rivals (dare I say exceeds?) the original candy bar. My twin sister discovered something similar at a sweet shop in Utah, and after one bite, I knew I had to recreate them in my own kitchen. What makes these extra special? The completely from-scratch caramel layer that sets them apart from other recipes!
Why You’ll Love These Homemade Twix Bars
- Three incredible layers that work in perfect harmony
- Made with real, simple ingredients you can pronounce
- No candy thermometer needed for the caramel
- Perfect make-ahead dessert (they keep well in the fridge)
- Buttery shortbread that literally melts in your mouth
- Rich homemade caramel that’s leagues better than melted store-bought caramels
- Silky chocolate topping that adds the perfect finish
- Easier than you think (I promise!)
Let me tell you – the moment I bit into one of these bars, I knew this recipe was something special. The shortbread base is adapted from my friends at King Arthur Flour (they know their stuff!), and it provides the perfect foundation for that luxurious homemade caramel layer. Unlike other copycat recipes that use melted store-bought caramels, we’re making our own caramel from scratch. Trust me, this extra step is absolutely worth it and makes these bars completely irresistible!
I’ve tested this recipe countless times to get it just right, and I’m thrilled to share all my tips and tricks with you. The best part? You don’t need any fancy equipment or hard-to-find ingredients. Just your basic baking staples and a little patience while the layers set. Whether you’re a seasoned baker or just starting out, these homemade Twix bars are guaranteed to impress!
Essential Ingredients for Perfect Homemade Twix Bars
Let me walk you through everything you’ll need to create these incredible copycat Twix bars, layer by delicious layer!
The Perfect Shortbread Base
- Cold Butter: The key to flaky, melt-in-your-mouth shortbread! I prefer using cold butter cut into small cubes – it creates those perfect tiny pockets of buttery goodness.
- Powdered Sugar: Not granulated! Powdered sugar gives our shortbread that delicate, tender crumb we’re looking for.
- All-Purpose Flour: Just regular flour works perfectly here. Be sure to measure it correctly by spooning into your measuring cup and leveling off.
- Vanilla Extract: Pure vanilla extract adds that wonderful depth of flavor that makes this shortbread extra special.
The Star of the Show: Homemade Caramel
- Butter + Brown Sugar: These create the foundation of our caramel. The molasses in brown sugar adds that gorgeous color and deep flavor.
- Light Corn Syrup: This prevents sugar crystallization and helps create that perfectly chewy texture.
- Sweetened Condensed Milk: My secret weapon! It makes the caramel extra creamy and helps achieve that signature Twix texture.
The Chocolate Topping
- Quality Chocolate: Here’s where I don’t compromise – use real chocolate bars or high-quality chocolate chips. My go-to is Ghirardelli.
- Butter: Just a tablespoon helps create that perfect snap when you bite into it.
Success Tips for Perfect Results
- Temperature Matters: Keep your butter cold for the shortbread, but room temperature for the caramel.
- The Ice Water Test: Don’t skip testing your caramel! Drop a small amount into ice water – if you can form a soft ball, it’s ready.
- Patience is Key: Let each layer cool completely before adding the next. Trust me, rushing leads to messy layers!
- Chocolate Tips: If using chocolate chips, add an extra 1/2 tablespoon of butter to help them melt smoothly.
- Clean Cuts: Run your knife under hot water and dry it between cuts for professional-looking bars.
Step-by-Step Instructions: Creating Perfect Homemade Twix Bars
Let’s break down this recipe into three glorious layers! I’ve made these countless times and have all the tricks to ensure your success. Here’s exactly how to create these irresistible treats:
Starting with the Shortbread Base
First, preheat your oven to 300°F and line a 9×13″ pan with parchment paper (leave some overhang for easy removal later – trust me, this is a game-changer!).
- In a large bowl, combine your cold cubed butter with powdered sugar, flour, and vanilla
- Use a pastry blender to work the mixture until it comes together into a crumbly dough
- Press evenly into your prepared pan (I use the bottom of a measuring cup for a perfectly smooth surface)
- Bake for 28-35 minutes until just barely golden at the edges
Creating That Perfect Caramel Layer
This is where the magic happens! While your shortbread cools, let’s make our caramel:
- Combine butter, brown sugar, corn syrup, and sweetened condensed milk in a medium saucepan
- Heat over medium, stirring constantly until it reaches a gentle boil
- Continue cooking and stirring for about 15-20 minutes until golden brown
- Test for doneness using the ice water method (drop a bit in ice water – it should form a soft ball)
- Pour immediately over your cooled shortbread
The Chocolate Finale
Once your caramel has set (at least 2 hours in the fridge), it’s time for the finishing touch:
- Gently melt chocolate and butter using a double boiler or microwave in 30-second bursts
- Pour over the set caramel layer and smooth with an offset spatula
- Refrigerate until the chocolate sets completely
Delicious Variations to Try

While the classic version is absolutely perfect, here are some fun twists I’ve discovered:
- Dark Chocolate Lover’s Version: Swap the milk chocolate for dark chocolate (60-70% cacao) for a more sophisticated flavor
- Sea Salt Edition: Sprinkle flaky sea salt over the chocolate before it sets
- Mini Twix Bites: Cut into smaller squares instead of bars for bite-sized treats
- Double Chocolate: Add 2 tablespoons of cocoa powder to the shortbread base
Storage Tips: Keep these beauties in an airtight container in the fridge for up to a week (if they last that long!). You can also freeze them for up to 3 months – just layer between pieces of parchment paper in a freezer-safe container.
FAQs & Final Thoughts
Let me answer some of your most common questions about these irresistible homemade Twix bars!
Absolutely! These bars keep beautifully in the fridge for up to a week. Just store them in an airtight container with layers of parchment paper between them. They’re actually even better the next day, as the flavors have time to meld together!
The most common cause is not cooking the caramel long enough. Make sure you’re doing the ice water test – the caramel should form a soft, pliable ball when dropped in ice water. If it’s spreading into a puddle, it needs more cooking time.
Yes, but choose high-quality chips like Ghirardelli and add an extra 1/2 tablespoon of butter when melting. This helps achieve that perfect smooth consistency we’re looking for.
This usually happens when the chocolate gets too hot while melting. Use gentle heat and stir frequently. If using a microwave, heat in 30-second intervals at 50% power, stirring between each interval.
Final Sweet Thoughts
Sweet friends, I can’t tell you how much joy these homemade Twix bars bring to everyone who tries them! That moment when you bite through the snappy chocolate into the buttery caramel and crisp shortbread – pure magic! They’ve become my go-to recipe for bake sales, holiday gatherings, or just because (because sometimes you need chocolate!).
Remember, don’t rush the process – let each layer set properly. The waiting is the hardest part, but oh my goodness, is it worth it! If you make these bars, snap a picture and tag me on social media – nothing makes me happier than seeing your baking successes! Happy baking, friends! ♥
PS: Looking for more chocolate-caramel goodness? Try my Millionaire’s Shortbread or Salted Caramel Brownies next!

HOMEMADE TWIX BARS
Equipment
- cut and serve turner
- Pastry Blender
- Parchment Paper
Ingredients
- 1 cup butter cold, (*see note)
- 1 cup powdered sugar
- 2 cups all-purpose flour
- 1 teaspoon vanilla extract
- 1 cup butter (*see note)
- 1 cup light brown sugar
- 1 cup light corn syrup
- 14 ounces sweetened condensed milk
- 3 cups chopped milk or dark chocolate
- 1 Tablespoon butter
Instructions
- Preheat oven to 300 degrees F. Line a 9×13″ pan with parchment paper, or spray really well with non-stick cooking spray.
- In a large bowl, use a pastry blender to combine the butter, sugar, flour, and vanilla until the mixture comes together. Press the shortbread dough into the pan.
- Bake for 28-35 minutes or until the crust is very lightly golden. Remove from oven and allow to cool completely.
- Combine all of the ingredients in a medium saucepan over medium heat.
- Maintain the heat at medium and bring mixture to a rolling boil, stirring often.
- Continue to cook, stirring constantly until the mixture reaches the soft ball stage, about 15-20 minutes).
- I test the “doneness” of the caramels using the ice water method: Stick several ice cubes in a cup and add cold water. Drop a spoonful of caramel into the ice water. If you’re able to clump the caramel sauce together in your hands to form a very soft ball, then it’s ready. When the caramel starts to turn golden brown, I do the ice water test every few minutes until I find that it’s ready, just to make sure I don’t overcook it.
- Once it reaches soft ball stage, remove from heat and pour the warm caramel over the cooled shortbread crust. Allow to cool for a few minutes, then refrigerate for at least 2 hours, or overnight.
- Add the butter and chocolate to a bowl and use a double boiler (or your microwave at low power, 30 second intervals, stirring in between) to melt the chocolate until smooth.
- Pour melted chocolate over the set up caramel and smooth into an even layer. Refrigerate until the chocolate is set.
- Store in the fridge, covered, for up to 1 week.
Leave a Reply