
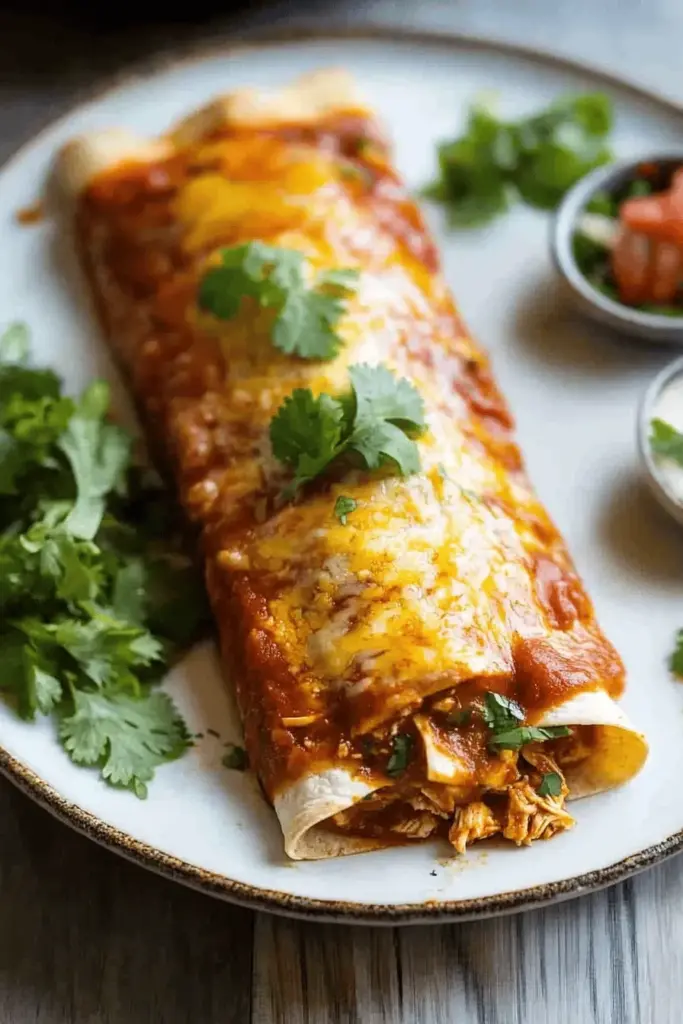
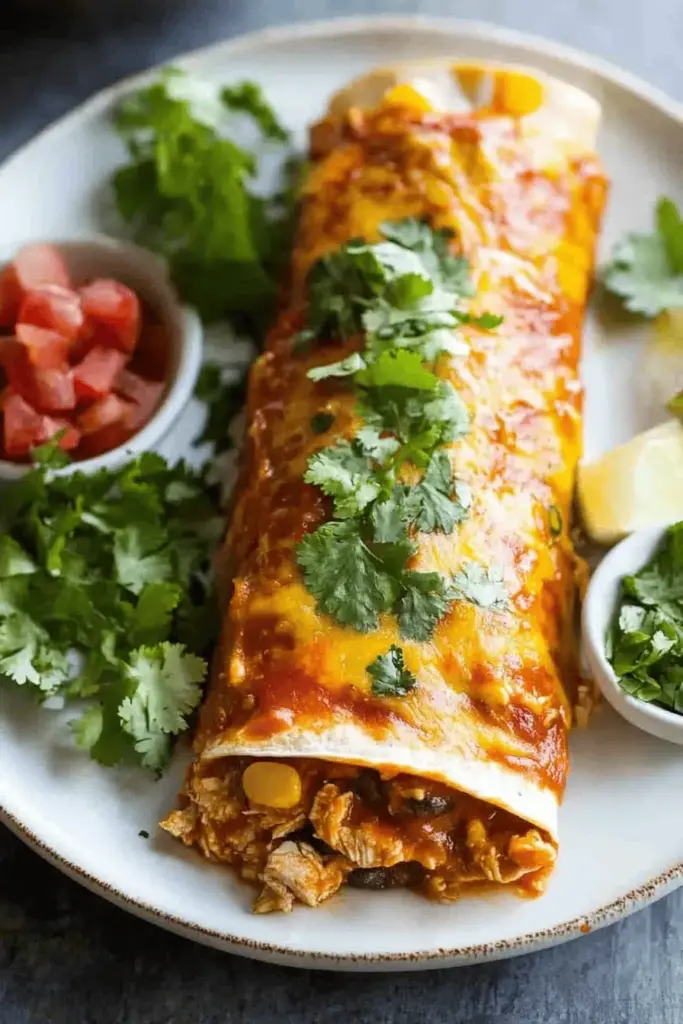
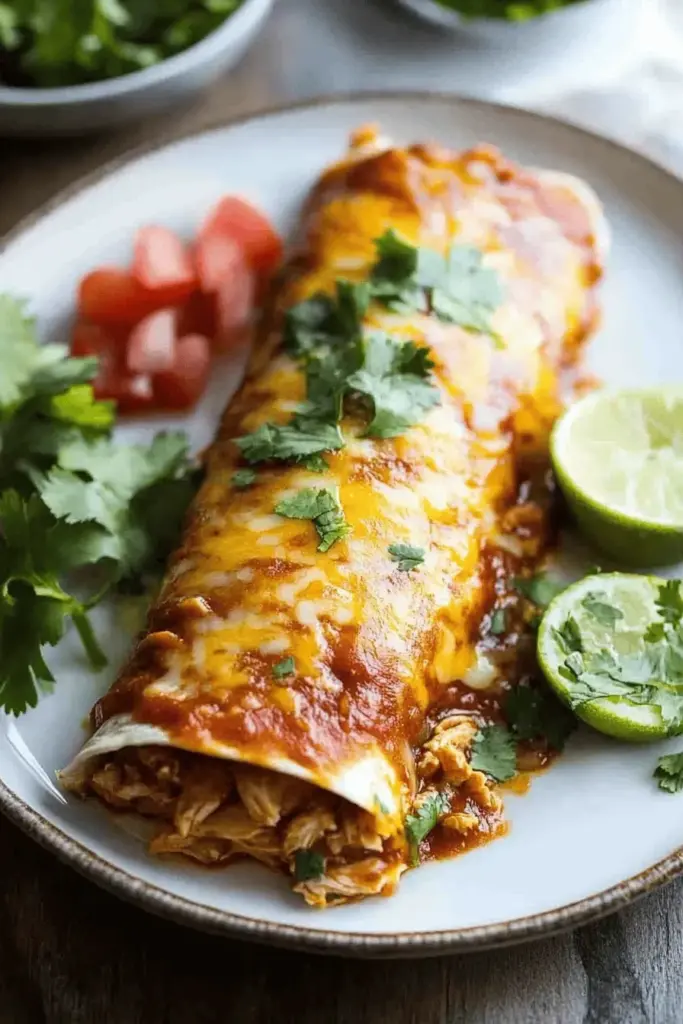
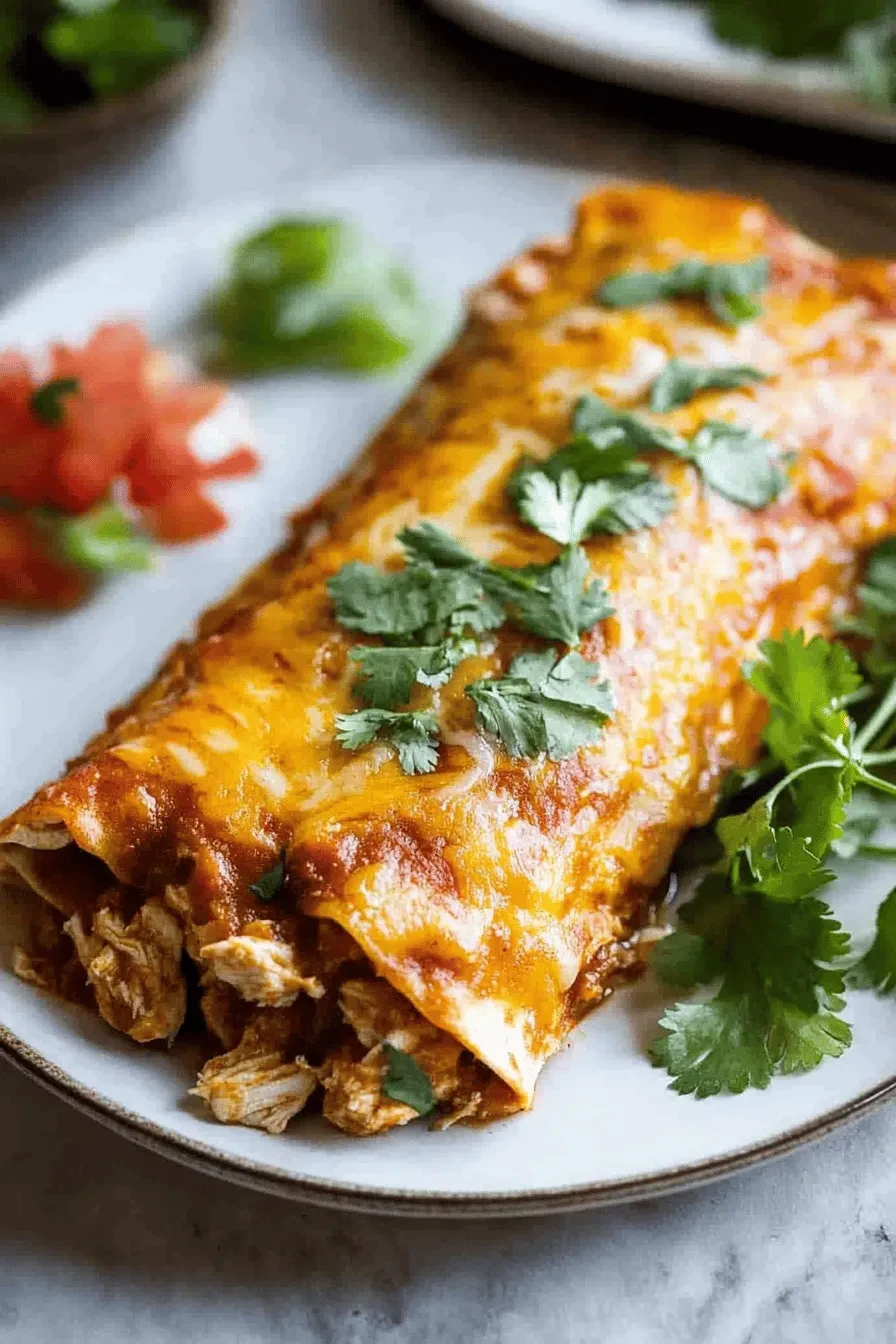
These irresistible loaded chicken enchiladas are the perfect blend of creamy, cheesy comfort food and authentic Mexican flavors. After spending countless hours perfecting this recipe in my kitchen (and many trips to my favorite Mexican restaurants!), I’m thrilled to share this family-favorite dish that’s guaranteed to become a staple in your recipe collection. Packed with tender shredded chicken, perfectly seasoned rice, black beans, and colorful vegetables, then wrapped in soft tortillas and smothered in homemade enchilada sauce – this is Mexican comfort food at its finest!

Why You’ll Love These Loaded Chicken Enchiladas
- Incredibly versatile – works with both flour or corn tortillas
- Make-ahead friendly – perfect for busy weeknights
- Freezer-friendly (makes TWO 9×13 pans!)
- Loaded with protein-rich chicken and fiber-packed beans
- Creamy, cheesy filling that stays moist
- Kid-approved and perfect for family dinner
- Restaurant-quality results at home
Let me tell you – these enchiladas are a game-changer. The secret is in the filling: we’re mixing tender shredded chicken with fluffy rice, black beans, sweet corn, and bell peppers, then folding in cream cheese and cream of chicken soup for the most incredible creamy texture. And don’t even get me started on that homemade enchilada sauce! It’s the perfect balance of rich and tangy flavors that seeps into every bite.
What I love most about this recipe is how flexible it is. You can prep it all ahead of time, freeze half for later (hello, future dinner!), or customize the filling to your family’s tastes. Plus, that moment when you pull these bubbling, cheese-topped enchiladas from the oven? Pure magic! The cheese gets perfectly melted and just slightly crispy on top, while the filling stays incredibly moist and flavorful.
Key Ingredients & Their Magic
Let me walk you through the stars of our enchilada show! After countless test runs in my kitchen, I’ve perfected this combination of ingredients that creates the most incredible, creamy filling.
- Shredded Chicken: This is our protein powerhouse! I love using rotisserie chicken for convenience, but you can also poach chicken breasts or use leftover roasted chicken. The key is shredding it while it’s still warm – it soaks up all those wonderful flavors so much better!
- Rice: My secret weapon for perfectly filled enchiladas! The rice acts like a sponge, soaking up all that creamy sauce while keeping the filling moist. My family’s top pick is cilantro-lime rice, but regular white rice works beautifully too.
- The Creamy Dream Team: The combination of cream cheese and cream of chicken soup creates this luxurious, velvety texture that’s absolutely magical. The cream cheese needs to be softened – I usually let it sit on the counter for about an hour before mixing.
- Fresh Vegetables: Bell peppers and onions aren’t just for color (though they make these enchiladas gorgeous!). They add the perfect bite of freshness and texture. I dice them pretty small so they blend seamlessly into the filling.
Success Tips From My Kitchen to Yours
After making these enchiladas hundreds of times (literally!), I’ve learned a few game-changing tricks that make all the difference.
- Don’t overfill your tortillas! I know it’s tempting, but stick to about ½ cup of filling per tortilla. This ensures they roll beautifully and don’t burst during baking.
- Warm your tortillas before rolling – just 20 seconds in the microwave between damp paper towels makes them perfectly pliable and prevents cracking. Trust me, this simple step makes assembly so much easier!
- Create a sauce barrier on the bottom of your baking dish. Spread a thin layer of enchilada sauce before adding your rolled enchiladas – it prevents sticking and adds extra flavor to every bite.
- Let them rest for 5-10 minutes after baking. This helps the filling set slightly, making them easier to serve and keeping all that goodness inside where it belongs!
Step-by-Step Guide to Perfect Enchiladas
Let me walk you through my foolproof method for assembling these incredible enchiladas! After countless batches (and a few messy learning experiences), I’ve perfected this process to make it simple and fun.
The Assembly Process
First, let’s prep our workspace:
- Clear a large counter space for your assembly line
- Have your baking dishes ready with a thin layer of enchilada sauce
- Keep your filling mixture and cheese within easy reach
- Stack your tortillas on a plate, covered with a slightly damp paper towel
Here’s my tried-and-true method for rolling perfect enchiladas every single time:
- Warm your tortillas for 20-30 seconds – this makes them perfectly pliable
- Spoon exactly ½ cup of filling in a line near one edge of the tortilla
- Sprinkle a generous pinch of cheese over the filling
- Roll from the filled edge, keeping it tight but gentle
- Place seam-side down in your prepared baking dish
My favorite trick: Once you’ve filled your baking dish, use the back of a spoon to spread the enchilada sauce evenly over the top. This ensures every enchilada gets that perfect sauce coverage!
Creative Variations & Make-Ahead Tips
These enchiladas are wonderfully versatile – let me share some of my favorite ways to customize them!
Filling Variations
- Protein Swap: Try shredded beef, ground turkey, or even roasted vegetables for a vegetarian version
- Cheese Options: Mix up your cheese blend – pepper jack adds a nice kick, while Oaxaca cheese gives an authentic Mexican touch
- Heat Level: Adjust the spice by varying your jalapeños or adding chipotle peppers in adobo
Make-Ahead Magic
Here’s my secret for stress-free entertaining: prep these beauties ahead of time!
- Assemble everything up to 24 hours in advance
- Cover tightly with foil and refrigerate
- Remove from fridge 30 minutes before baking
- Add the sauce and cheese just before popping them in the oven
Pro Tip: When freezing, wrap your pan in two layers of foil and one layer of plastic wrap. Label with the date and baking instructions – your future self will thank you!
FAQs & Final Thoughts
Absolutely! I love using rotisserie chicken as a time-saving shortcut. Just shred the meat while it’s still warm – it absorbs the flavors beautifully. One average-sized rotisserie chicken should give you enough meat for this recipe.
The key to preventing soggy enchiladas is not overdoing the sauce. Start with a thin layer on the bottom of your pan, then pour the remainder over the top. Also, make sure your filling isn’t too wet before rolling. I always drain and rinse my beans and corn thoroughly!
While I love using a Mexican cheese blend, you can’t go wrong with monterey jack or even sharp cheddar. The secret is using freshly grated cheese – it melts so much better than pre-shredded varieties. For extra indulgence, try mixing in some Oaxaca cheese!
You sure can! Add extra diced jalapeños to your filling, use pepper jack cheese instead of monterey jack, or spice up your enchilada sauce with a dash of cayenne pepper. Just remember to taste as you go!
Final Thoughts
Oh my goodness, friends – these enchiladas are pure comfort food magic! Every time I pull a pan from the oven, watching that cheese bubble and listening to my family rush to the kitchen, I’m reminded why this recipe is such a treasured favorite in our house.
Remember, don’t stress too much about making them perfect – enchiladas are wonderfully forgiving! Whether you’re making them for a cozy family dinner or doubling the batch for a neighborhood potluck, these loaded chicken enchiladas never disappoint. The best part? You can prep them ahead and even freeze a pan for those busy weeknights when cooking feels impossible.
I’d absolutely love to hear how these turn out in your kitchen! Drop me a comment below if you try them, or tag me in your photos – seeing your creations makes my day! And if you love these as much as we do, be sure to check out my homemade salsa and Mexican rice recipes – they’re match made in heaven with these enchiladas!
Happy cooking, friends! ♥
Loaded Chicken Enchiladas
Equipment
- 2 9×13 inch pans
- Large bowl
Ingredients
- 3 cups cooked chicken shredded (about 3 breasts or 4 thighs)
- 2.5 cups cooked rice see note*
- 1 can corn drained
- 1 can black beans rinsed and drained
- 1/2 green bell pepper chopped
- 1/4 onion chopped
- 1 clove garlic minced
- 4 ounces canned jalapeño peppers or diced green chilies
- 1 can cream of chicken soup see note**
- 4 ounces cream cheese softened
- 3 cups shredded cheese (mozzarella or mexican blend)
- 16 large flour tortillas (not burrito size)
- 1 batch red enchilada sauce (or 4 cups store bought)
Instructions
- Preheat oven to 400 degrees F.
- Add a few spoonfuls of enchilada sauce to the bottom of TWO 9×13 inch pans.
- Add all ingredients except for the tortillas and enchilada sauce to a very large bowl. Stir everything until evenly combined.
- Spoon ½ cup of filling mixture into a line on the edge of a tortilla. Sprinkle a small handful of shredded cheese on top of the filling.
- Roll the tortilla tightly and place it seam side down into prepared pan. Each pan should be able to fit 7-8 enchiladas.
- Pour sauce over the top of the enchiladas, dividing it between both pans. Sprinkle any remaining cheese on top.
- Bake at 400 degrees for 15-20 minutes, or until cheese is melted and bubbly.
- Serve with 5-minute homemade salsa or pico de gallo
Leave a Reply