
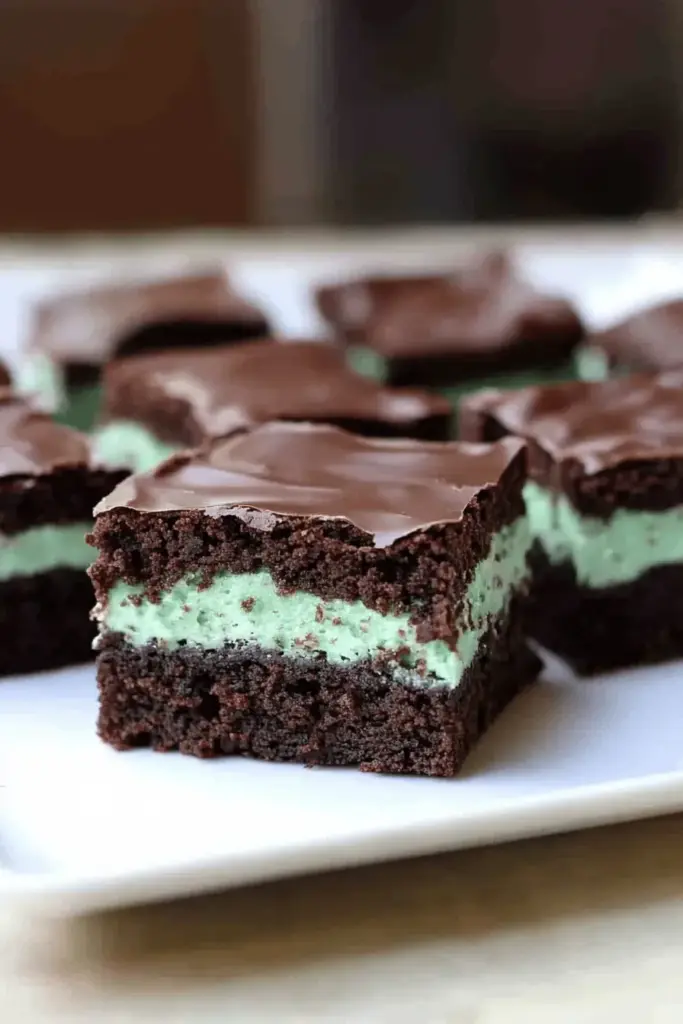
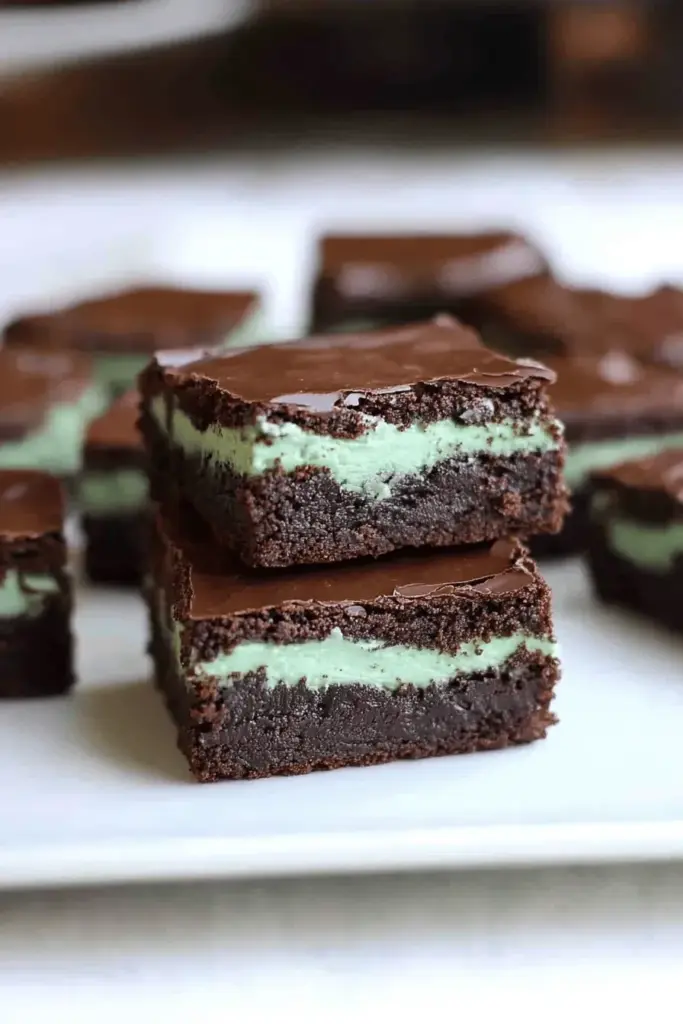
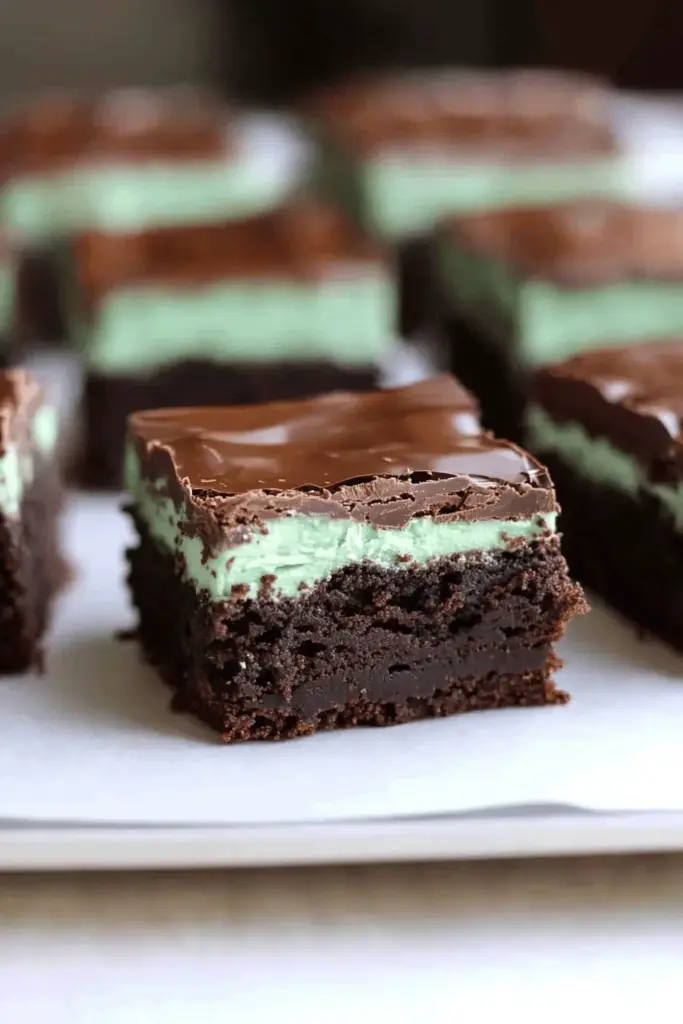
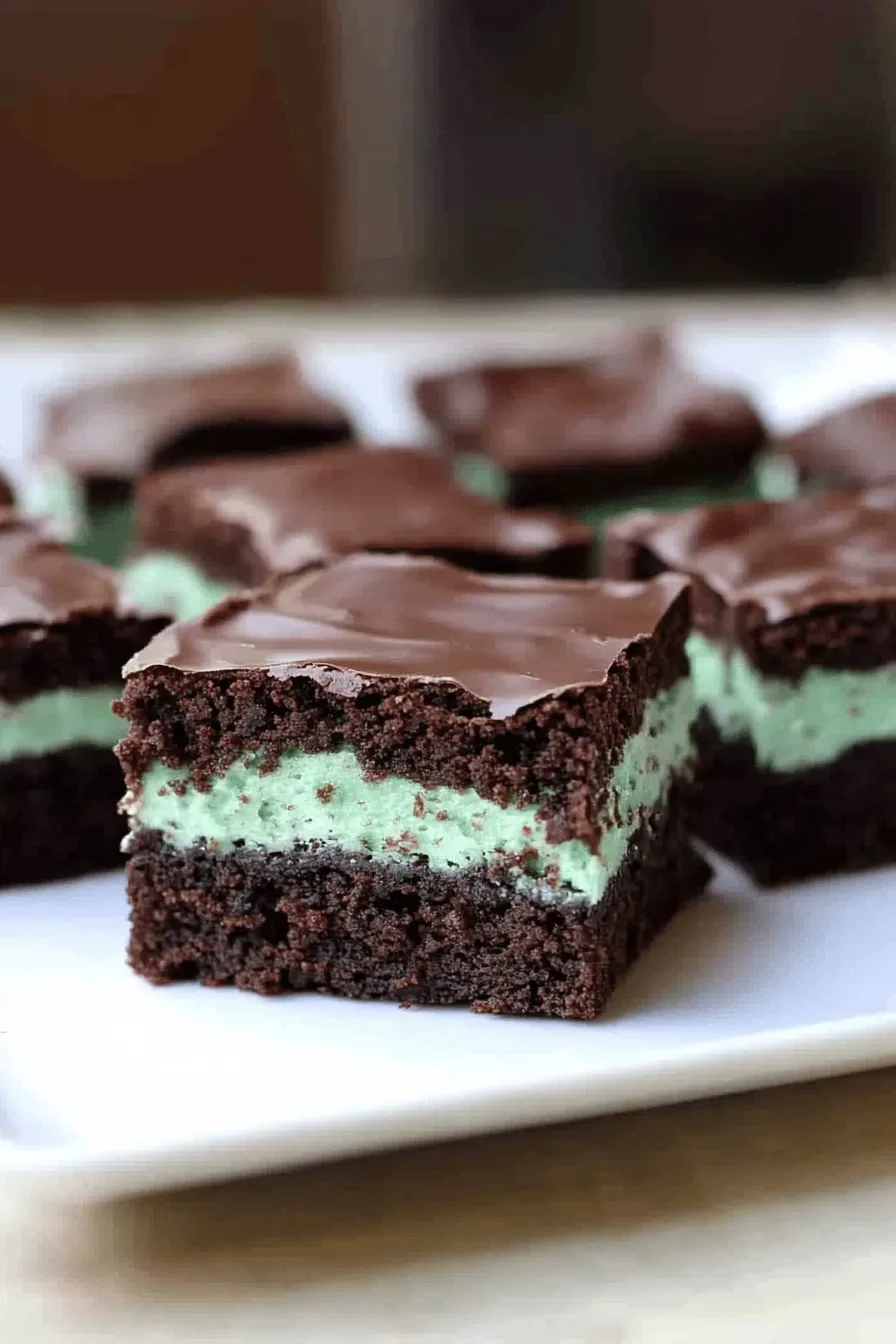
These irresistible homemade mint brownies combine three heavenly layers – a rich, fudgy chocolate brownie base, creamy peppermint frosting, and smooth chocolate glaze on top. Fair warning: they’re completely addictive! I’ve perfected this recipe over countless batches to create the ultimate mint chocolate treat that disappears at every gathering.
Why You’ll Love These Mint Brownies
- Ultra fudgy brownies made with real melted chocolate
- Perfect balance of chocolate and peppermint flavors
- Three distinct layers with amazing texture contrast
- Made from scratch but totally approachable
- Perfect make-ahead dessert for parties
- No mixer needed for the brownie base
- Freezer-friendly for up to 3 months
Let me tell you a little secret – I originally created these brownies to give to a friend who just moved to the neighborhood. But after that first test bite (you know, for quality control!), there was absolutely no way these beauties were leaving my kitchen! The fudgy brownie base literally melts in your mouth, while the cool peppermint frosting adds the perfect refreshing contrast. And that glossy chocolate top layer? Pure heaven!
What makes these brownies extra special is starting with real melted chocolate instead of cocoa powder. I use unsweetened baker’s chocolate combined with butter to create an incredibly rich, dense brownie base that stays perfectly moist for days (though good luck having them last that long!). And here’s a pro tip: make sure to use peppermint extract, not mint extract, in the frosting. Regular mint extract can give an artificial, toothpaste-like flavor that we definitely want to avoid.
Whether you’re making these for a holiday gathering, birthday celebration, or just because it’s Tuesday, I guarantee they’ll become a fast favorite. Just don’t say I didn’t warn you about their addictive nature!
Essential Ingredients for Perfect Mint Brownies
Let me walk you through the key players that make these triple-layer mint brownies absolutely irresistible!
The secret to their incredible fudginess starts with the chocolate…
- Unsweetened Baking Chocolate: This is the foundation of our brownie base. I specifically use unsweetened chocolate bars (not cocoa powder) because they create that dense, fudgy texture we’re after. When melted with butter, it forms an incredibly rich base that stays moist for days.
- Butter: We need real butter here, not margarine or substitutes. It melts with the chocolate to create that perfect fudgy consistency and adds necessary richness. Make sure it’s at room temperature for easy melting.
- Peppermint Extract: This is crucial – use PEPPERMINT extract, not mint extract! Trust me, mint extract can give that artificial toothpaste taste nobody wants. Pure peppermint extract provides that perfect cool, refreshing flavor that makes these brownies special.
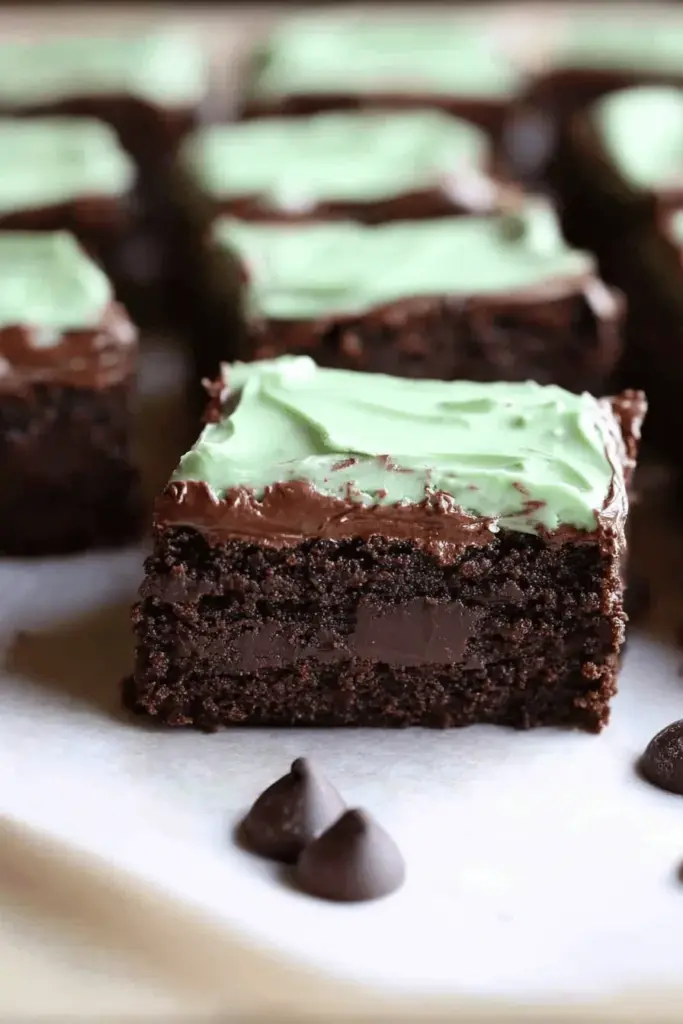
- Green Food Coloring: Just a few drops give that classic mint green color to the frosting layer. It’s optional but adds such nice visual appeal.
Essential Tips for Success
After making these countless times, I’ve learned some crucial tricks that make all the difference:
- Temperature Matters: Let each layer set properly before adding the next. I pop mine in the fridge for about 15 minutes between layers to prevent mixing and make spreading easier.
- Perfect Chocolate Glaze: When melting chocolate for the top layer, use 30-second intervals at 50% power. Overheated chocolate becomes grainy and unusable. Let it cool for 5-10 minutes before spreading.
- Cutting Clean Squares: Here’s my favorite trick – let the brownies sit at room temperature for 10 minutes before cutting. If you slice them straight from the fridge, the chocolate top will crack. Run your knife under hot water, dry it, then slice for perfectly clean cuts.
- Storage Wisdom: These actually taste better the second day! Store them in an airtight container in the fridge, but serve them slightly closer to room temperature when the mint flavor really shines.
Step-by-Step Instructions for Perfect Mint Brownies
Let me walk you through exactly how to create these triple-layer beauties! I’ve made these countless times and have perfected each step to ensure your mint brownies turn out absolutely divine.
Making the Brownie Base
- Preheat your oven to 350°F and grease a 9×13-inch pan. I like to line it with parchment paper for easy removal.
- Start by melting the unsweetened chocolate and butter together. I prefer doing this in a double boiler, but you can use the microwave in 30-second bursts at 50% power, stirring between each interval.
- In a large bowl, whisk together eggs, sugar, and vanilla until well combined. Pro tip: Room temperature eggs will blend much more smoothly!
- Slowly stream in the melted chocolate mixture while whisking constantly. This prevents the eggs from scrambling and ensures a silky-smooth batter.
- Gently fold in the flour and baking powder just until combined – don’t overmix!
Creating the Mint Layer
While your brownies cool completely (and I mean completely!), let’s make that dreamy mint frosting:
- Beat softened butter until creamy and light
- Gradually add powdered sugar, alternating with small splashes of milk
- Mix in 1½ teaspoons peppermint extract – taste test before adding more!
- Add 2-3 drops of green food coloring for that classic mint look
Recipe Variations & Creative Twists
Over the years, I’ve experimented with several delicious variations that you might want to try:
- Gluten-Free Version: Replace the all-purpose flour with your favorite cup-for-cup gluten-free blend. I’ve had great success with Bob’s Red Mill 1-to-1 Baking Flour.
- Dark Chocolate Lover’s Version: Swap the semi-sweet chocolate in the glaze for dark chocolate (70% cocoa or higher) for an even richer experience.
- Holiday Variation: During Christmas, I sometimes add crushed candy canes on top of the chocolate layer before it sets – the crunch is amazing!
- Mini Size: Make them in a mini muffin tin for perfect two-bite brownies. Just reduce the baking time to about 15 minutes.
Storage Tips: These brownies actually get better after a day in the fridge! Store them in an airtight container for up to a week (though they’ve never lasted that long in my house). You can also freeze them for up to 3 months – just thaw overnight in the refrigerator before serving.
Make-Ahead Tip: You can make these in stages over a couple of days – bake the brownies one day, add the mint layer the next, and finish with the chocolate glaze when you’re ready to serve.
FAQs & Final Thoughts
Let me address some common questions I get about these mint brownies, plus share some final thoughts after making countless batches!
The most common reason is cutting the brownies while they’re too cold. Let them sit at room temperature for 10-15 minutes before cutting. Also, run your knife under hot water, dry it off, then make your cuts. This helps create clean, crack-free slices.
Absolutely! They freeze beautifully for up to 3 months. I recommend freezing them whole rather than pre-cut to maintain moisture. Wrap tightly in plastic wrap, then foil. Thaw overnight in the refrigerator before serving.
The key is giving each layer enough time to set. After spreading the mint frosting, refrigerate for at least 15-20 minutes before adding the chocolate glaze. Also, make sure your brownies are completely cool before adding the mint layer.
Of course! The food coloring is purely for visual appeal. Your brownies will taste just as delicious without it. Some of my readers have used natural alternatives like matcha powder for color, though this will slightly affect the taste.
Final Thoughts
Oh my goodness, friends – I can’t tell you how much joy these mint brownies bring to every gathering! They’re one of those treats that make people’s eyes light up when they take that first bite. The combination of fudgy chocolate, cool peppermint, and that perfect chocolate glaze is simply magical.
If you’re still on the fence about making these, let me give you that gentle push you need – go for it! They might look fancy with their three layers, but I promise they’re totally manageable, even for newer bakers. Take your time, follow the cooling steps, and you’ll end up with brownies that look like they came from a fancy bakery.
I’d absolutely love to hear how these turn out for you! Drop a comment below or tag me in your brownie photos – nothing makes me happier than seeing your baking success stories. And if you love these, don’t forget to check out my other brownie recipes. Happy baking, friends! 💚
MINT BROWNIES
Equipment
- 9×13 inch pan greased
- Microwave safe bowl
- Large bowl
- Small bowl
Ingredients
- 4 ounces unsweetened baking chocolate
- 1 cup butter
- 4 large eggs
- 2 cups granulated sugar
- 1 teaspoon vanilla extract
- 1 1/4 cups all-purpose flour
- 1/2 teaspoon baking powder
- 2 cups powdered sugar
- 4 Tablespoons butter room temperature
- 1 1/2 teaspoons peppermint extract
- 1-2 Tablespoons milk
- green food coloring
- 6 ounces semi-sweet chocolate chips (about 1 cup)
- 5 Tablespoons butter
Instructions
- Preheat oven to 350 degrees F. Grease a 9×13” inch pan with nonstick cooking spray.
- Chop the butter and the unsweetened chocolate into chunks and place together in a microwave safe bowl.
- Microwave on low power in 30 second intervals, stirring in between, until melted. (You could also melt them over LOW heat in a saucepan, stirring constantly). Set aside to cool, stirring occasionally.
- In a large bowl beat together the eggs, sugar, and vanilla. Slowly add the melted chocolate, while stirring.
- In a separate small bowl combine the flour and baking powder. Stir the flour into the chocolate batter, just until combined. Don’t over-mix.
- Pour batter into greased pan and bake for 20-30 minutes or until a toothpick inserted in the center comes out clean.
- Remove from oven and allow to cool completely.
- Combine all frosting ingredients and beat until light and fluffy. Add more milk if you want it thinner.
- Spread the frosting evenly over the cooled brownies. Refrigerate while you make the chocolate glaze.
- Place chocolate chips and butter in a microwave safe bowl. Microwave one low power in 30 second intervals, stirring in between, until melted and smooth. Allow to cool for about 5-10 minutes.
- Spread evenly over the frosted brownies. Return to fridge to allow the chocolate to harden.
- Allow the bars to sit at room temperature for 10 minutes before cutting into squares. (If you try to cut into them while they are cold the top chocolate layer will crack pretty easily and they wont be as pretty).
Notes
Add extra flour if baking at high altitute
Leave a Reply